
How to Store Root Vegetables: Potatoes, Onions, Garlic, Ginger, Carrots (Complete Guide)
Derek LeQuick answer: Store root vegetables cool, dark, dry, and unwashed — never together. Potatoes ruin onions in 2 weeks.
Key Takeaways
- Different rules per vegetable: Potatoes, onions, and garlic want a 45–65°F pantry. Ginger and carrots want a 32–40°F fridge. There is no single storage spot that works for all five.
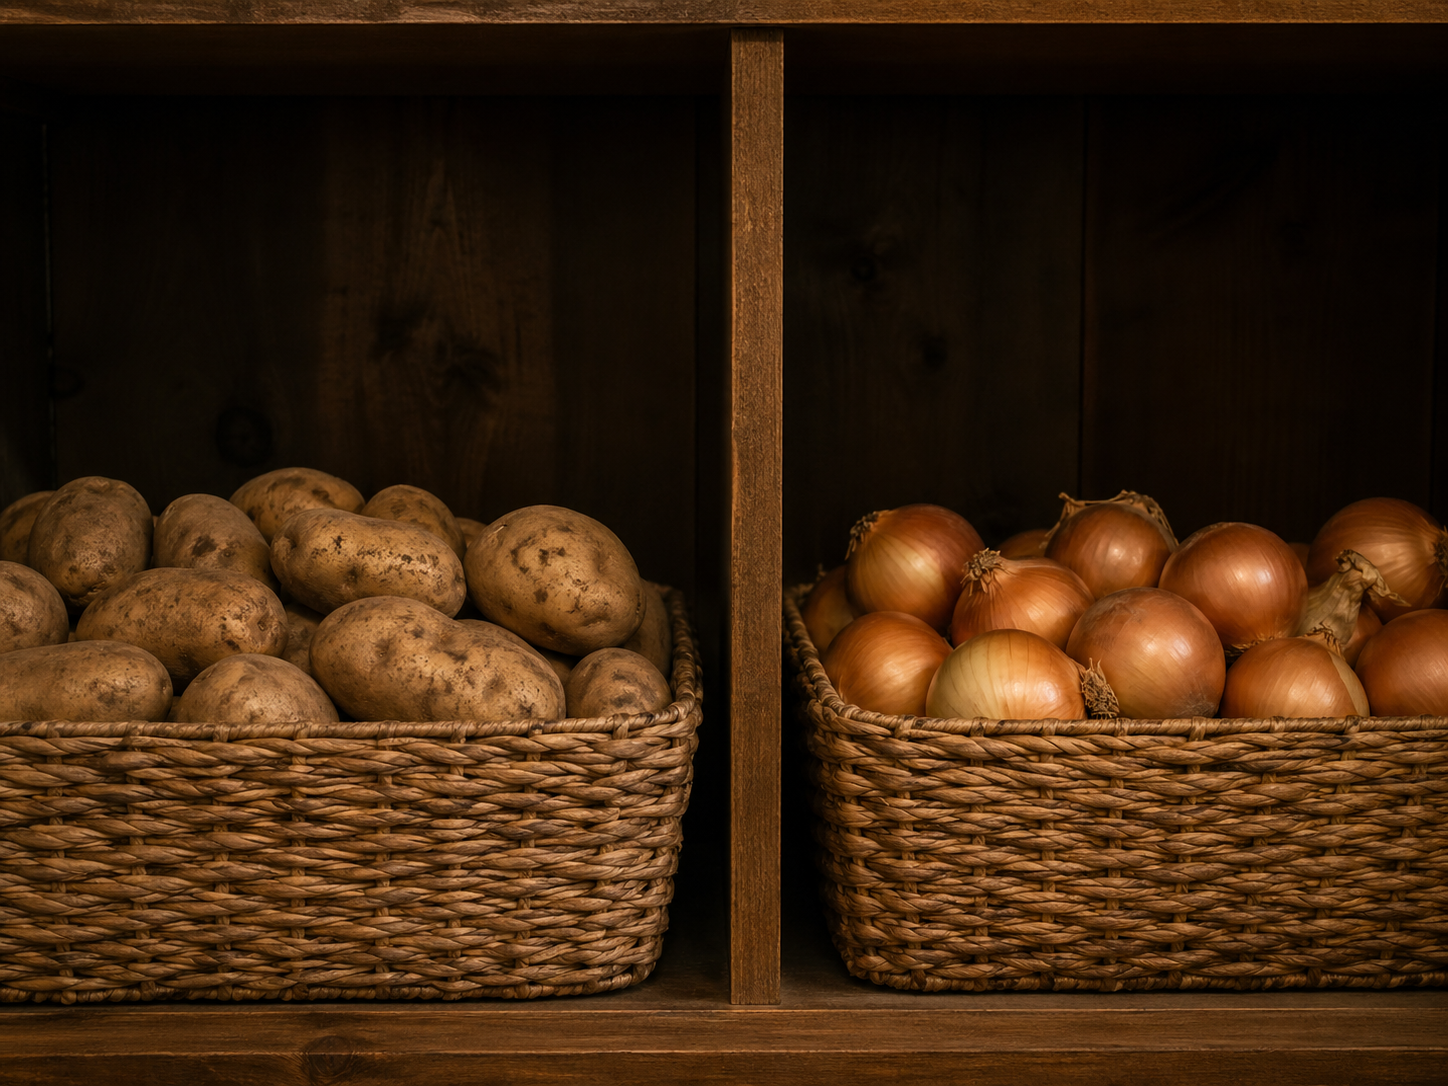
- Never store potatoes with onions: Onions emit ethylene gas that sprouts potatoes within 2 weeks, and potatoes release moisture that rots onions. Separate bins, separate shelves.
- Plastic bags are the enemy: They trap moisture and suffocate root vegetables. Use paper bags, mesh, burlap, or ventilated bins instead.
- Wash right before eating, not before storing: Surface moisture is the #1 cause of rot for every root vegetable on this list.
- Most American pantries are too warm: The 45–55°F sweet spot for potatoes and onions is rare in modern homes. A pantry thermometer pays for itself in 1 month of saved produce.
Last updated: May 2026 · Last tested: April 2026 · Written by Derek Le, home cook & founder of LoveGreatFinds
You buy a 5-pound bag of potatoes for $4. Three weeks later, half are sprouting eyes, two are green, and one has gone soft. You toss them, blame yourself for "buying too many," and the cycle repeats next month. The problem isn't the quantity — it's the storage. Root vegetables look durable, but each one has wildly different temperature, humidity, and light requirements. Get them wrong and you waste $20–30 a month in compost. This guide walks through the only storage method that matters for each of the five most common root vegetables in an American kitchen — potatoes, onions, garlic, ginger, and carrots — plus the five mistakes that quietly destroy your produce drawer.
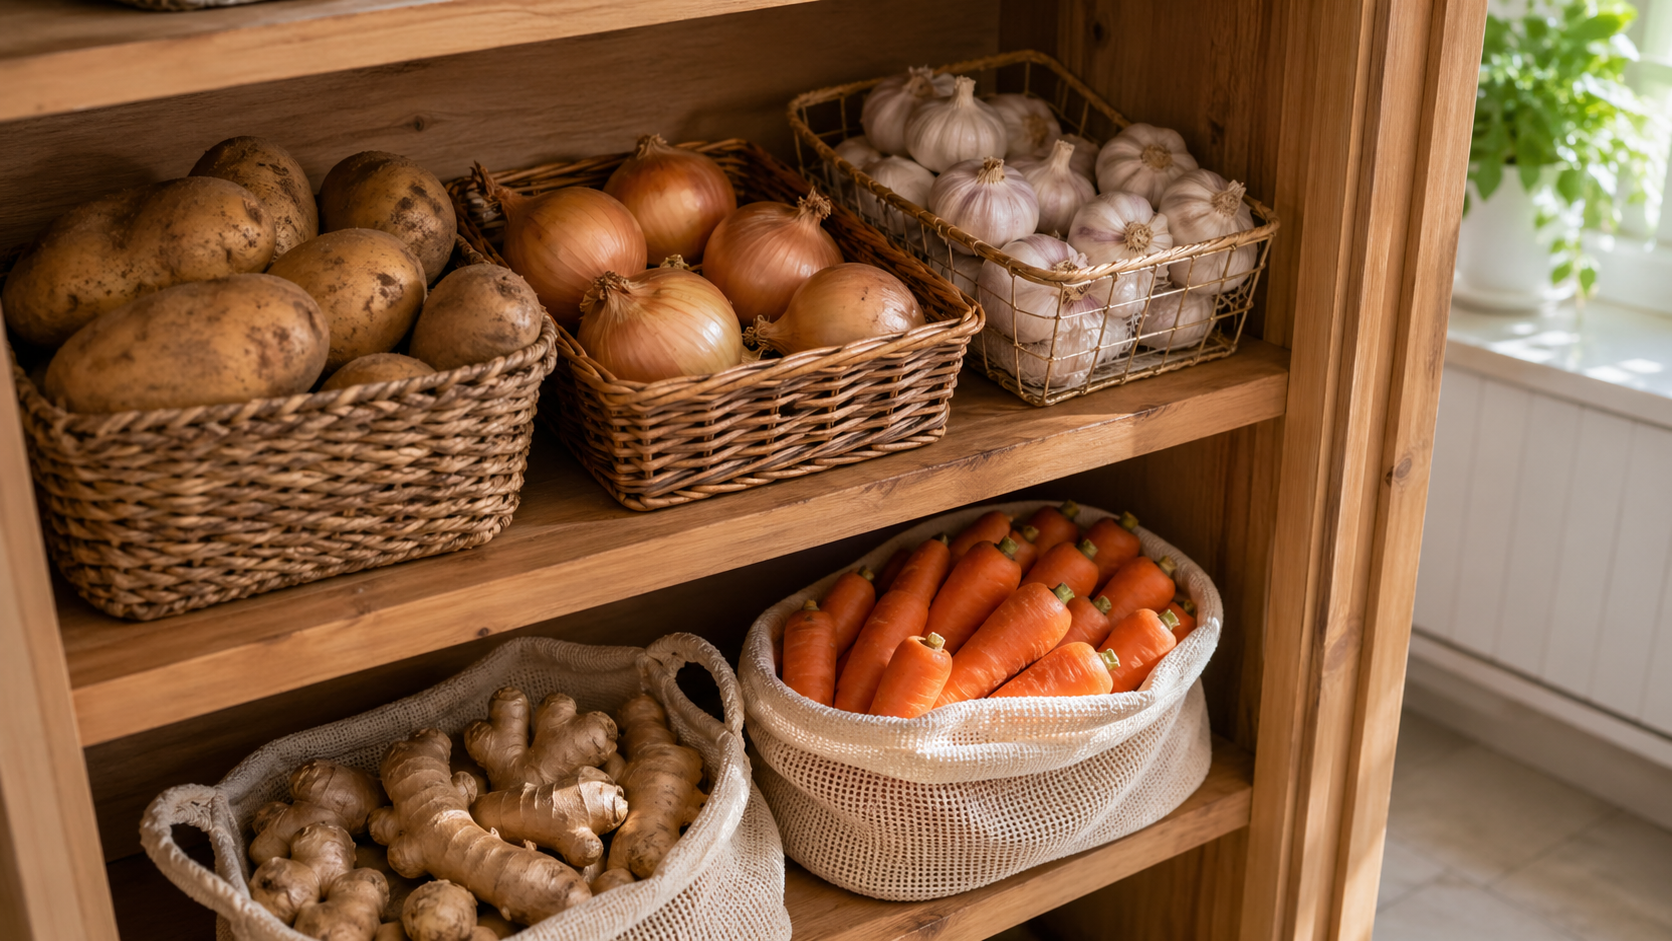
The Universal Rules for Root Vegetable Storage
Before getting into specific vegetables, four rules apply across the board: cool temperature (45–55°F is ideal for most), low humidity (40–60% relative humidity), no direct light (UV triggers chemical changes), and air circulation (stagnant air breeds mold). Most kitchen pantries fail on at least two of these — usually temperature and air circulation. A $10 thermometer hung in your pantry is the single most useful purchase for cutting produce waste.
Here is the cheat sheet. Print it, tape it inside your pantry door, and stop guessing:
| Vegetable | Ideal Temp | Shelf Life | Best Location | What Kills It |
|---|---|---|---|---|
| Potatoes | 45–50°F | 4–8 weeks | Pantry / cellar (paper bag) | Light, ethylene from onions |
| Onions | 45–55°F | 1–2 months | Pantry mesh bag | Moisture, contact with potatoes |
| Garlic | 60–65°F | 3–5 months | Counter mesh basket | Refrigeration (causes sprouting) |
| Ginger | 33–40°F | 3 weeks | Fridge crisper (paper bag) | Plastic wrap, freezer burn |
| Carrots | 32–40°F | 4–5 weeks | Fridge (submerged in water) | Ethylene from fruits, attached tops |
The biggest takeaway from that table is the ethylene problem. Onions, apples, and bananas release ethylene gas as they age. Potatoes, leafy greens, and carrots are highly sensitive to it — exposure accelerates sprouting and softening. The single most damaging storage mistake in American kitchens is putting potatoes and onions in the same bin, because both crops fail twice as fast together as they would separately. For a broader breakdown of which vegetables play nicely together (and which don't) across your entire kitchen, see our A-Z vegetable storage guide.
How to Store Potatoes (4–8 Weeks at 45–50°F)
Answer: Store potatoes unwashed in a paper or burlap bag in a 45–50°F dark pantry. Below 40°F converts starch to sugar, giving you sweet, gummy potatoes that brown fast when cooked. Never store with onions.
The fridge feels like the safe choice, but it ruins potatoes. Refrigeration triggers a process called cold-induced sweetening — the potato converts its starch into reducing sugars (glucose and fructose) below 40°F. Cook those sugary potatoes at high heat and they brown to a near-burnt color in minutes, plus produce more acrylamide, a compound the FDA recommends limiting. The pantry, cellar, or even an unheated garage closet at 45–50°F is the right answer.
For containers, paper grocery bags, burlap sacks, woven baskets, or mesh bins all work. The non-negotiable is air circulation — never store potatoes in a sealed plastic bag or airtight container. Trapped moisture turns the bottom of the pile into mush within a week. Keep them completely in the dark. Light exposure triggers chlorophyll production (the green tinge), which signals the presence of solanine — a bitter compound that becomes toxic in larger amounts. If a potato has more than a small green patch, peel it generously or compost it.
Signs your potatoes have gone bad:
- Sprouting eyes longer than ½ inch: Small sprouts can be cut off; long sprouts mean the potato has used up its starches and will taste bitter.
- Green skin or green spots: Solanine warning — peel deeply or discard if more than a quarter of the surface is green.
- Soft, wrinkled, or shriveled: Moisture has evaporated; texture will be mealy and flavor flat.
- Visible mold or a musty smell: Compost the entire bag; mold spreads invisibly through neighboring potatoes.
Can you freeze potatoes? Only after blanching or cooking. Raw potato cells rupture when frozen, turning to gray mush on thaw. Cooked mashed potatoes, par-baked fries, and shredded blanched hash browns all freeze beautifully for 6–8 months.
How to Store Onions (1–2 Months at 45–55°F)
Answer: Store whole onions in a mesh bag, ventilated bin, or hung in pantyhose at 45–55°F. Cut onions go in an airtight container in the fridge for 7–10 days. Keep them apart from potatoes — always.
Whole, dry-skinned onions need exactly the opposite of what most people give them: dry air, not a humid drawer. The classic farmhouse trick is hanging onions in pantyhose with a knot tied between each one — when you need an onion, snip below the knot. The mesh maximizes airflow, the knots prevent bruising, and the onions last 2 to 3 months. A wire basket on a high pantry shelf works almost as well.
Once cut, the rules flip completely. A sliced or chopped onion needs the fridge, in an airtight container, used within 7–10 days. This is where reusable silicone stretch lids earn their place — drop the cut half on a small plate or bowl, stretch a lid over the top, and skip the plastic wrap waste. The seal also keeps the onion smell from migrating to your butter and berries.
Signs your onions have gone bad:
- Soft spots or dark patches on the skin: Internal rot has started — cut into it; if the layer beneath is brown or slimy, discard.
- Sprouting green shoots from the top: Still edible if firm; flavor will be sharper and slightly bitter.
- Sour or fermented smell: Bacterial breakdown — compost immediately, don't try to salvage.
- Mushy or oozing texture: Game over.
For chopped onions you want to freeze in bulk for cooking, the prep is the bottleneck. A multi-blade vegetable chopper can dice 4 large onions in 90 seconds without the eye-burning, knife-skill demands. Portion into freezer bags or stretch-lid-sealed containers in 1-cup amounts and freeze flat for up to 6 months. Cooked recipes (soups, stews, sautés) won't notice the texture change. For the deep dive on the freezer side of meal prep, our complete meal prep guide covers batch-prep workflows that pair perfectly with frozen aromatics.
FEATURED TOOL
16-in-1 Vegetable Chopper
Dices onions, carrots, and aromatics for a full week of dinners in one 10-minute session — then seal in airtight containers and refrigerate.
Get the Chopper → Under $25How to Store Garlic (3–5 Months at Counter / 30 Days Fridge)
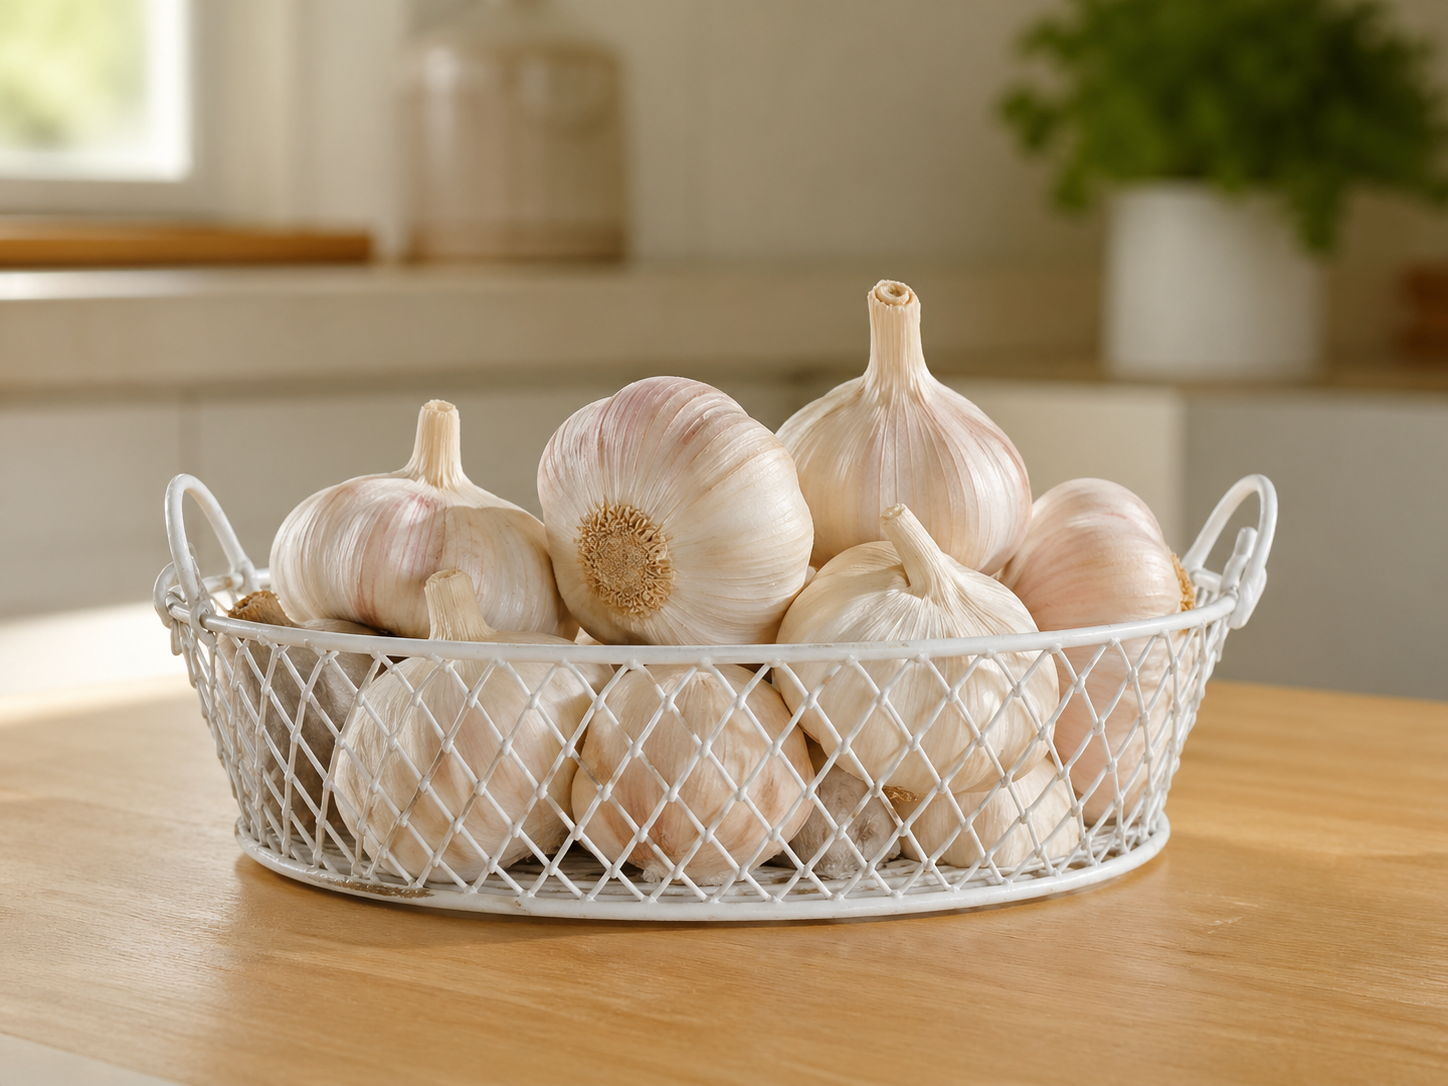
Answer: Store whole heads of garlic at 60–65°F on the counter in a mesh container for 3–5 months. The fridge causes sprouting in 30 days. Peeled cloves keep 7–10 days in the fridge.
Garlic is the easiest of the five to store badly. The most common mistake is treating it like ginger and tossing it in the fridge — cold temperature triggers the dormant clove to sprout within a month, splitting the head and turning each clove bitter. The right home for whole garlic is a mesh wire basket, ceramic garlic keeper with airflow holes, or even a small woven bowl on the counter, kept out of direct sunlight at room temperature.
Once you break the head and peel cloves, the storage rules change. Peeled cloves need refrigeration in an airtight glass jar, used within 7–10 days. They lose flavor and dry out fast — buy whole heads and peel as you go. The peeling step is where most home cooks lose patience, which is exactly the friction that makes a garlic press rocker set useful: it crushes whole, unpeeled cloves in one rock motion and pulls the skin off cleanly, so you stop "saving the peeling for tomorrow" and use fresh garlic on a Tuesday night.
For long-term storage beyond 5 months, freeze it. Three methods work: whole unpeeled heads in a freezer bag (6 months, grate frozen as needed), peeled cloves in an airtight container (4 months, slightly softer texture), or minced garlic stirred into olive oil and frozen in ice cube trays (3 months, ready-to-cook portions). Avoid storing fresh garlic submerged in oil at room temperature — it creates an anaerobic environment that can cultivate Clostridium botulinum, the bacterium that causes botulism.
Signs your garlic has gone bad:
- Soft cloves under finger pressure: Should be rock-hard; any give means decay has started.
- Brown or yellow spots inside the clove: Mold or bacterial breakdown — discard the entire head.
- Green sprouts emerging from the top of cloves: Still edible but bitter; remove the green germ before crushing.
- Sour, off, or fermented smell: Compost.
How to Store Ginger (3 Weeks Fridge / 6 Months Freezer)
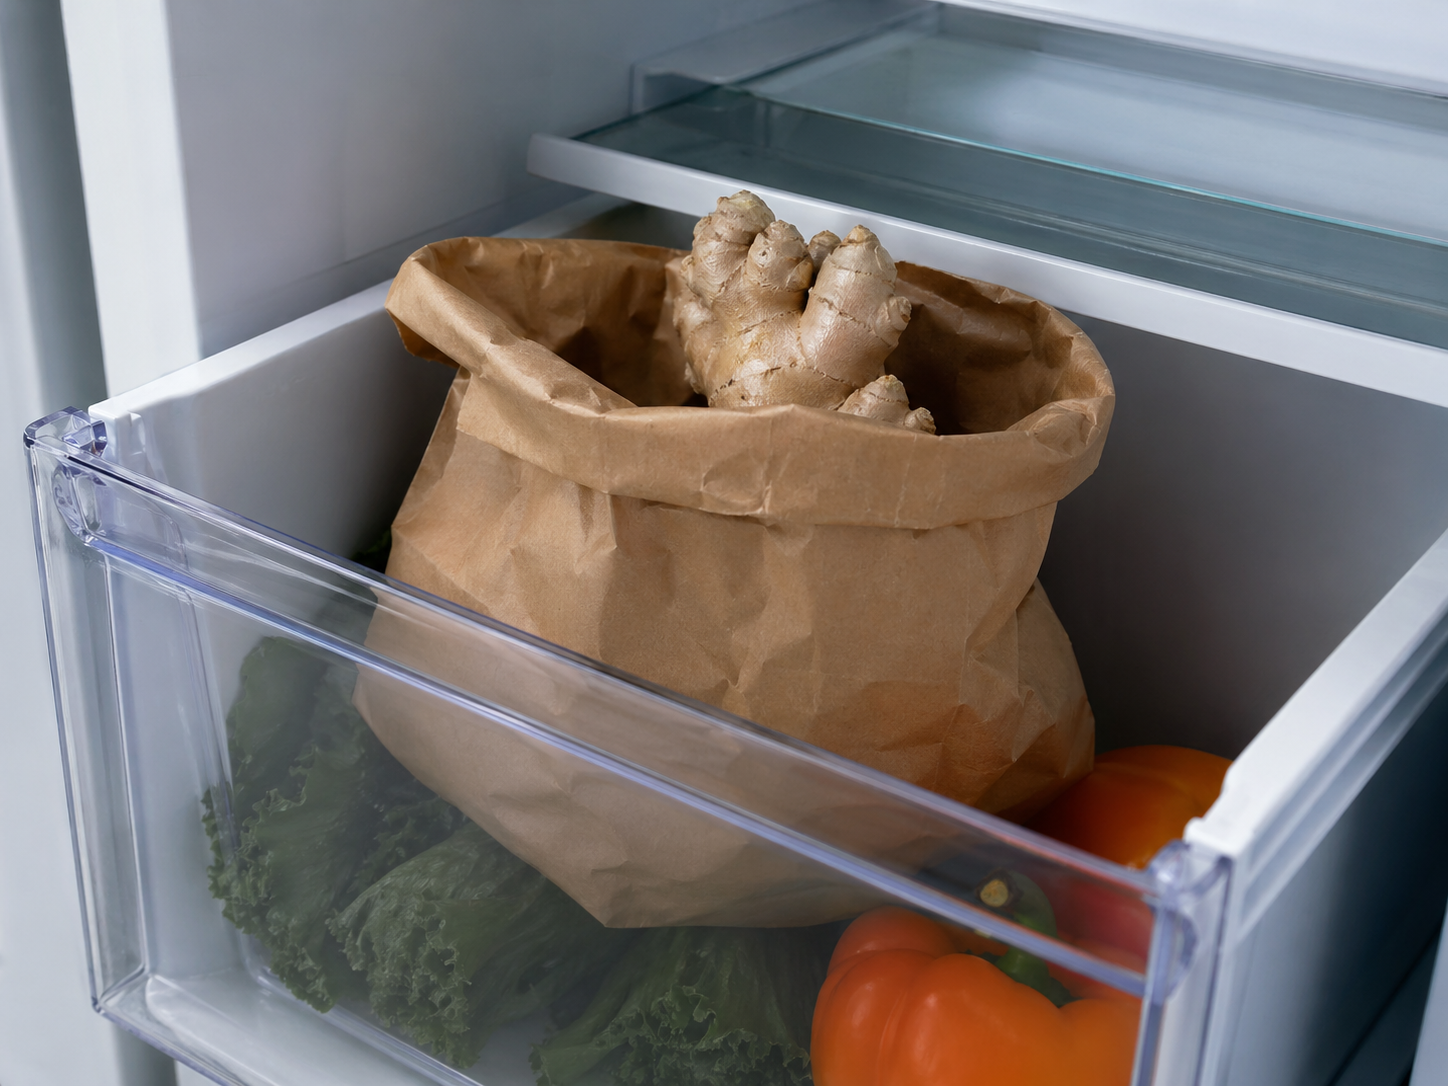
Answer: Store fresh ginger unpeeled in a paper bag in the fridge crisper drawer for up to 3 weeks. For longer storage, freeze whole roots — grate them frozen for fresh flavor for up to 6 months.
Ginger likes cold and dry — exactly what the fridge crisper provides, with one critical caveat: never wrap it in plastic. Plastic traps the natural moisture ginger releases as it ages, and the root grows mold within a week. The right move is a brown paper lunch bag, loosely folded but not sealed, in the crisper drawer. The paper absorbs surface moisture while still letting the root breathe.
For meal preppers who buy ginger in bulk, the freezer is the secret. Frozen ginger grates more easily than fresh — the fibers shatter into a fine pulp instead of stringing — and lasts 6 months without flavor loss. Wrap whole knobs in a freezer bag, push out the air, and pull them out one at a time as recipes call for them. A silicone stretch lid sealed over a small bowl of pre-grated frozen ginger gives you a quick-access stash for stir-fries and curries without re-grating every time.
FEATURED TOOL
Silicone Stretch Lids (6-Pack)
Seals half-used ginger, cut carrots, and peeled garlic — keeps root vegetables fresh after the first cut without mismatched lids.
Get the Lids → Under $15The vodka submersion trick is a real chef hack: place peeled ginger pieces in a small jar, cover with vodka or sherry, seal, and refrigerate. The alcohol prevents mold for up to 6 months. The downside is that the ginger absorbs a slight alcoholic edge — fine for cooked dishes, less ideal for raw juicing. For zone-by-zone optimization of where everything in your fridge belongs, our fridge organization chart is worth printing.
Signs your ginger has gone bad:
- Soft, wrinkled, or shriveled skin: Has dried out; texture will be papery and flavor faded.
- Visible mold (white, green, or fuzzy): Discard the entire root — mold runs deep into the fibers.
- Off or sour smell instead of bright zing: Bacterial decay has started.
- Slimy surface or dark mushy spots: Compost immediately.
How to Store Carrots (4–5 Weeks Fridge in Water)
Answer: Store whole carrots submerged in a container of water in the fridge crisper for 4–5 weeks — change the water every 4–5 days. Removing the green tops first extends life by 2x because the leafy tops actively pull moisture from the root.
If you've ever pulled limp, bendy carrots from the fridge after a week, the cause is dehydration — carrots are 88% water and lose moisture fast through their cut stem ends and skin. The professional fix is the water-jar method: cut the green tops off (or remove the top inch from store-bought carrots), stand the carrots upright in a tall glass jar or pitcher, and fill with cold water until they're submerged. Refrigerate. Change the water every 4–5 days when it gets cloudy.

The water method buys you 4–5 weeks of crisp, snappy carrots — a 2x improvement over the typical "throw the bag in the crisper" approach. If a water jar isn't realistic for your fridge layout, the second-best option is a sealed plastic bag in the high-humidity crisper drawer with a paper towel to absorb excess moisture, which gets you 2–3 weeks. Baby carrots come pre-bagged in a moisture-controlled atmosphere — keep them in their original bag, and drain any liquid that pools at the bottom every few days.
One ethylene warning for carrots: keep them away from apples, bananas, pears, and avocados in the fridge. The ethylene gas these fruits emit makes carrots taste bitter within a week. Different crisper drawers if your fridge has them, or different shelves if not.
Signs your carrots have gone bad:
- Slimy film on the surface: Bacterial growth — compost the entire batch.
- Soft, bendable, or rubbery texture: Severely dehydrated; can sometimes be revived in ice water for 2 hours, but flavor will be flat.
- White cloudy "blush" on the skin: Surface dehydration, not mold; safe to eat after a quick wash, but flavor is fading.
- Off or sour smell instead of earthy-sweet: Discard.
What NOT to Do (5 Common Storage Mistakes)
Answer: Storing potatoes and onions together causes both to rot in 2 weeks. Plastic bags suffocate root vegetables. Refrigerating tomatoes destroys their flavor. Most American pantries are 5–10°F too warm. Washing produce before storing is the fastest path to mold.
Mistake 1: Storing potatoes and onions together. Onions release ethylene gas, which signals neighboring potatoes to sprout. Potatoes release moisture, which softens nearby onions. The two cancel each other out within 2 weeks. Use separate baskets on separate shelves.
Mistake 2: Sealing root vegetables in plastic bags. Plastic traps moisture, and trapped moisture is the start of every mold colony. Paper, mesh, burlap, woven baskets, and ventilated wire bins all work. Save plastic for cut vegetables that are going straight into the fridge.
Mistake 3: Washing before storing. Surface moisture is the #1 trigger of rot for potatoes, onions, garlic, and ginger. Brush off visible dirt with a dry cloth, but save the rinse for right before you cook. Carrots are the exception — water storage is their best method, but that water needs to stay clean and changed.
Mistake 4: Storing in transparent or glass containers in light. UV light triggers chlorophyll production in potatoes (toxic solanine), causes garlic to sprout 2x faster, and bleaches color out of carrots. Opaque containers, dark cabinets, or pantry shelves with closed doors all work.
Mistake 5: Pantry temperature above 60°F. The 45–55°F sweet spot for potatoes and onions is rare in modern American homes — most kitchen pantries run 65–72°F because they share air with the heated kitchen. If your pantry is too warm, the cool basement, an attached garage closet that doesn't freeze, or a dedicated mini-fridge set to 50°F all work better. A pantry thermometer for $10 will tell you the truth in 24 hours.
To set up a pantry that actually solves these problems by zone — produce shelf, dry goods, canned goods, snacks — our pantry organization guide walks through the full layout. And if you're upgrading your container game across the kitchen at the same time, our roundup of the best food storage containers for 2026 covers what to buy and what to skip.
Frequently Asked Questions
Can I store all root vegetables together in one bin?
No. Potatoes and onions are actively incompatible (ethylene cross-contamination). Garlic wants warmer counter temperature than potatoes. Ginger and carrots both need refrigeration. The five vegetables in this guide need three different storage zones — pantry, counter, and fridge — to last their full shelf life.
What temperature should my pantry be?
Ideally 45–55°F for potatoes, onions, and garlic. Most American kitchen pantries run 65–72°F because they share air with the heated kitchen, which cuts produce shelf life roughly in half. A $10 pantry thermometer tells you the truth, and a basement, garage closet, or dedicated mini-fridge can fix it.
How long do potatoes last in the fridge?
Don't put potatoes in the fridge. Cold temperature converts the starch to sugar, giving you sweet, gummy, brown-when-cooked potatoes plus higher acrylamide levels. The pantry at 45–50°F gives you 4–8 weeks of fresh potatoes — much longer than the fridge ever could.
Can you freeze fresh garlic?
Yes. Three methods work: whole unpeeled heads in a freezer bag for 6 months (grate frozen), peeled cloves in an airtight container for 4 months, or minced garlic in olive oil frozen in ice cube trays for 3 months. Skip the room-temp garlic-in-oil version — it carries a botulism risk.
Why are my potatoes sprouting after only a few weeks?
Two likely causes: pantry too warm (above 55°F speeds dormancy break) or stored next to onions or apples (ethylene exposure). Move them to your coolest, darkest spot, separate them from any ethylene producers, and sprouts should slow dramatically.
Should I wash root vegetables before storing them?
No. Surface moisture causes rot. Brush off visible dirt with a dry cloth or paper towel, but save the rinse for right before cooking. Carrots are the exception — they store best in clean water, with the water changed every 4–5 days.
What's the best container for storing root vegetables?
Paper bags, burlap sacks, mesh bags, woven baskets, or ventilated wire bins. Any container that allows air circulation will work. Avoid plastic bags, sealed glass jars, and Tupperware for raw root vegetables — trapped moisture causes rot every time.
How can I tell if ginger is still good?
Fresh ginger has firm, tan skin and a bright, peppery aroma when scratched. If the root is soft, wrinkled, has visible mold, or smells sour instead of zingy, compost it. Ginger can also be safely frozen for 6 months when you're not sure you'll use it in time.
The Bottom Line
Root vegetables look indestructible at the grocery store and look like compost three weeks later. The fix is one zoning decision per vegetable: potatoes and onions to a cool dark pantry (in separate bins), garlic to a counter mesh basket, ginger and carrots to specific spots in the fridge. Get those four placements right and you'll cut produce waste in half this month. For the next layer — applying the same logic to leafy greens, fruits, and crispers across your whole kitchen — see our complete A-Z vegetable storage guide, and pair it with a weekly meal prep system so the produce you saved actually gets eaten.
📚 Part of the Food Storage Cluster:


